Followers

Sunday, 7 January 2024

Happy 1st Birthday

 Good morning and a very happy Sunday! I hope you've all had a lovely Christmas and a very happy new year.  My project today is a first birthday card, and for this I've chosen one of my favourite Relatively Thoughtful collections, The Magic of Childhood.

 
I started by choosing my patterned papers and cutting my layers. My base card is 20 x 20 cm (just shy of 8 inches) so my layers are each an 1/8th of an inch smaller.
The first thing I did was to 'gut' my layers. This is for a number of reasons. Firstly it stops the card from being too 'front' heavy. Secondly, it keeps the weight down which is very important these days if you are posting your cards. Also, it's much easier to put your card back in place when it comes from the same sheet.
'
Once my base layers were done I made my focal points. The dragon is a set of Tim Holtz dies that hadn't been out of their packet so I was very keen to use them. The teddy is from a sheet of cut aparts and it's the perfect size to add your sentiment to. I've given them both a layer of glittery Mod Podge to make them stronger and because every one-year-old deserves pink and glittery!
This is the first layer.
The other layers have been popped up on foam tape to help give them some definition. I've also added some stamping.
Next it's time for the glittery dragon.
And the next layer isn't as easy to spot - it's a layer of acetate. I really like how acetate looks on a card, and it also lets you add another layer but keep it separate at the same time.
This is how it looks with the acetate layer open. You see how the teddy is part of the design, but still separate.
And with the acetate layer closed.
What's not to love about a pink glittery dragon!

What a cutie!
I've added a few gems too for a bit of extra sparkle.
The collection can be found here in the Relatively Thoughtful store in both digital and physical collections.

As always there is new inspiration every day on our social pages

Take care, and have a lovely day whatever you are doing x


Sunday, 3 December 2023

Walking In A Winter Wonderland

Good morning and a very happy Sunday. For my project today I've made a photo wallet using two beautiful Relatively Thoughtful collections Winter Wonderland and Christmas Vintage Postcards.

This base is cut with a huge A4 CoolKats die.

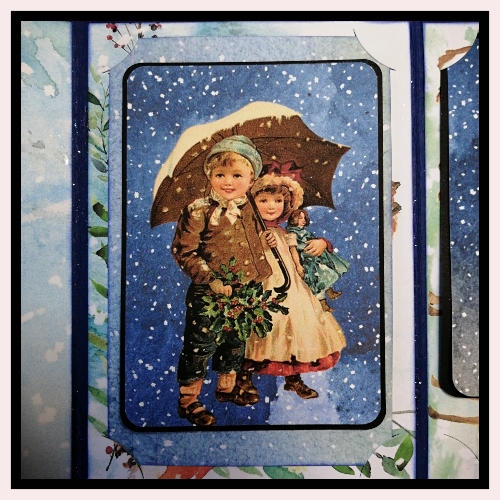
This sheet is from the Christmas Vintage Postcard collection, and I've used it for a layer for the front.
Then I chose my three main image papers. Winter Wonderland was the very first collection that I bought from Relatively Thoughtful, and it's still my favourite (don't tell my other papers lol)
Don't these look stunning as photo mats? These have been cut with another die from the photo wallet collection.
There's loads of paper left once the images have been cut out to make the final mats.
This is the inside. The images are so beautiful it will be a shame to cover them up. You can just see the slits in the corners where you can add your 6x4 photos.
This is the front, all tucked and folded away.
And this is the back. Of course I've used lots of glitter - it is nearly Christmas after all!
Some close -ups.

This is how it looks with a 6x4 photo
Or using it as a tuck spot for a smaller image.
As always the collections are available in the Relatively Thoughtful store.


Also check out our social pages where new inspiration is posted every day.

Take care and have a very happy week x

Sunday, 5 November 2023

Here Come The Girls

 Good morning and a very happy Sunday!

Today I'm sharing a triptych that I made with the beautiful Poppy Fields collection from Relatively Thoughtful.

I started by cutting four black tags. Three are for the triptych, and the fourth is to make a little pocket for each. If I use the same die I know that they will fit.
I then taped the tags together so that they would stand up independently.
Aren't these papers beautiful? These are really nice nesting dies too as they just show a little border. This is the first layer done!
And this is my second set of tags. These will fit in the pockets of the triptych. These beautiful Poppy ladies are just a fraction of the cut-aparts in this collection.
You can see the little pockets here. There are also cut-apart sheets full of sentiments.
One of the lovely things about this collection is that there are plainer papers that really complement the fabulous patterned ones.
The Poppy ladies are SO pretty!
I've also added a little bit of glitter - well it would be rude not to!
As always the collection is available in digital and paper versions and can be found here in the Relatively Thoughtful store.
These cute Poppy girls are also available for FREE in the store here.

There's also a fun Christmas competition over on our Facebook page, so please pop across here to download your papers and join in!
I hope you have a lovely day whatever you are doing, and thanks so much for looking xx

Sunday, 22 October 2023

Autumn Passions

 Good morning and a very happy Sunday. Today I'm sharing a small mini album made with the beautiful Autumn Passions collection from Relatively Thoughtful.

Again I've followed a Paul Lang Ford tutorial and I will put a link at the bottom of the post.

This is quite a small album, it's 6.25 x 4.25.


It has 6 tag pocket pages. If you pop across to Papercrafting With Paul he'll show you exactly how they are made.

The tags have been cut with the large G45 die and then turned into pockets.

I've used some of the images from the many cut apart sheets to make a pocket and a tuck spot.

I've put the tuck spot on the front cover and it will take 3x4 photos.
The pocket is on the back cover and will store 6x4 photos.
And just to prove it, look who's here again!
These are my 6 tags. Don't all these papers work beautifully together?
I've used a die to cut the slits into the paper so that you can change your photos around.
I've cut some of the images from the cut apart sheets to 3x4, and put them in place. That way you know where not to put your glue when you stick your paper to the base tag.

Such beautiful papers.

And I love the little pocket on the reverse. This will take 4x3 photos too.
Paul really is a genius when he designs his albums. He really knows how the get the most from the papers.

If I had to choose I think this is my favourite page.
I've die cut, then stamped and embossed loads of leaves for my front cover. I've also used some Little Birdie flowers that you can find in the store, together with images and a sentiment from the cut apart sheets.

Of course, I had to use some sequins and Glossy Accents too!
As always the collections are available here in Sally's store in both digital and physical paper versions.


There is new inspiration every day from my teamies and myself on our social pages.

For the full step-by-step guide on how to make this fabulous album please visit Paul's social pages.

I hope you like my album, why not have a go and make one for yourself.
Take care and have a very happy week!